HOW WE DESIGNED OUR SMALL OUTDOOR SPACE

DECOR
Styling Series
HOW WE DESIGNED OUR SMALL OUTDOOR SPACE
This outdoor space was one of the main reasons Nick and I wanted to move from the city to the countryside. Where we lived previously, we didn’t even have a balcony, so having an outdoor space no matter how small was extremely exciting for us.
'
Step One
WHAT DO YOU WANT YOUR SPACE TO BE?
Live in your space for a little while and see how you naturally use it, what are you missing? what do you wish you had? and then get started.
I had always dreamed of having a covered porch where I could sit with a cup of coffee in hand on a rainy day, covered with a blanket listening to the pitter patter of raindrops dancing on the roof and the whisper of leaves blowing in the breeze.
When it came to designing our outdoor space Nick and I thought a lot about what we would actually want to use the space for. It’s quite small so we didn’t have the space available to us to have an outdoor dining table and an area to relax. We had to to decide which was more important to us. After living in our home for a few months we decided that it was best suited for a space for us to relax, work and entertain guests. It backs onto these gorgeous 100 year old oak trees but behind those trees is a busy street and having an outdoor dining table just wouldn’t make sense there. We live really close to a park with picnic tables so if we really wanted to eat outside we could have a picnic or eat casually on the coffee table.
Once we landed on how we wanted the space to function we started looking at inspiration for ways to layout our space so that it used the little amount of space we had effectively. I wanted to keep the pathway from the stairs to the door open which meant all of our furniture would need to be pushed to one side. This meant if we wanted a lot of seating a sectional would be out best option. It would fit right into the corner and provide a lot of seating without taking up a lot of real estate.
Step Two
FIND OUT WHAT YOU LIKE AND START SHOPPING.
Start looking on Pinterest and Instagram to find what you’re drawn too.
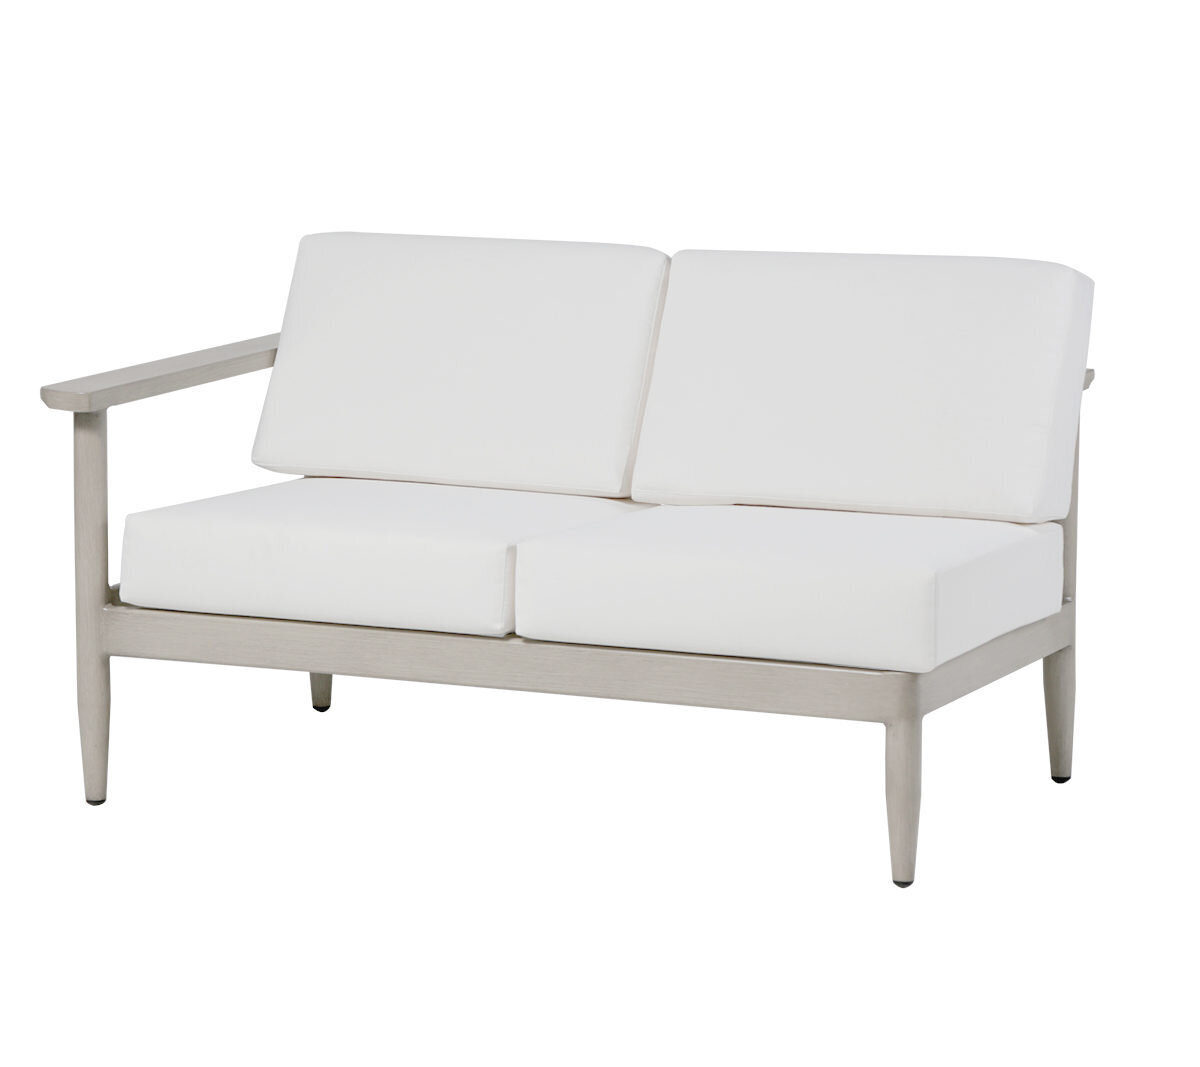
We started looking online for the style of sectionals we liked cough Restoration Hardware outdoor furniture cough. Once we knew the style we wanted to replicate we started shopping for furniture with a similar aesthetic with a much more manigable price tag and that would fit in our small space.
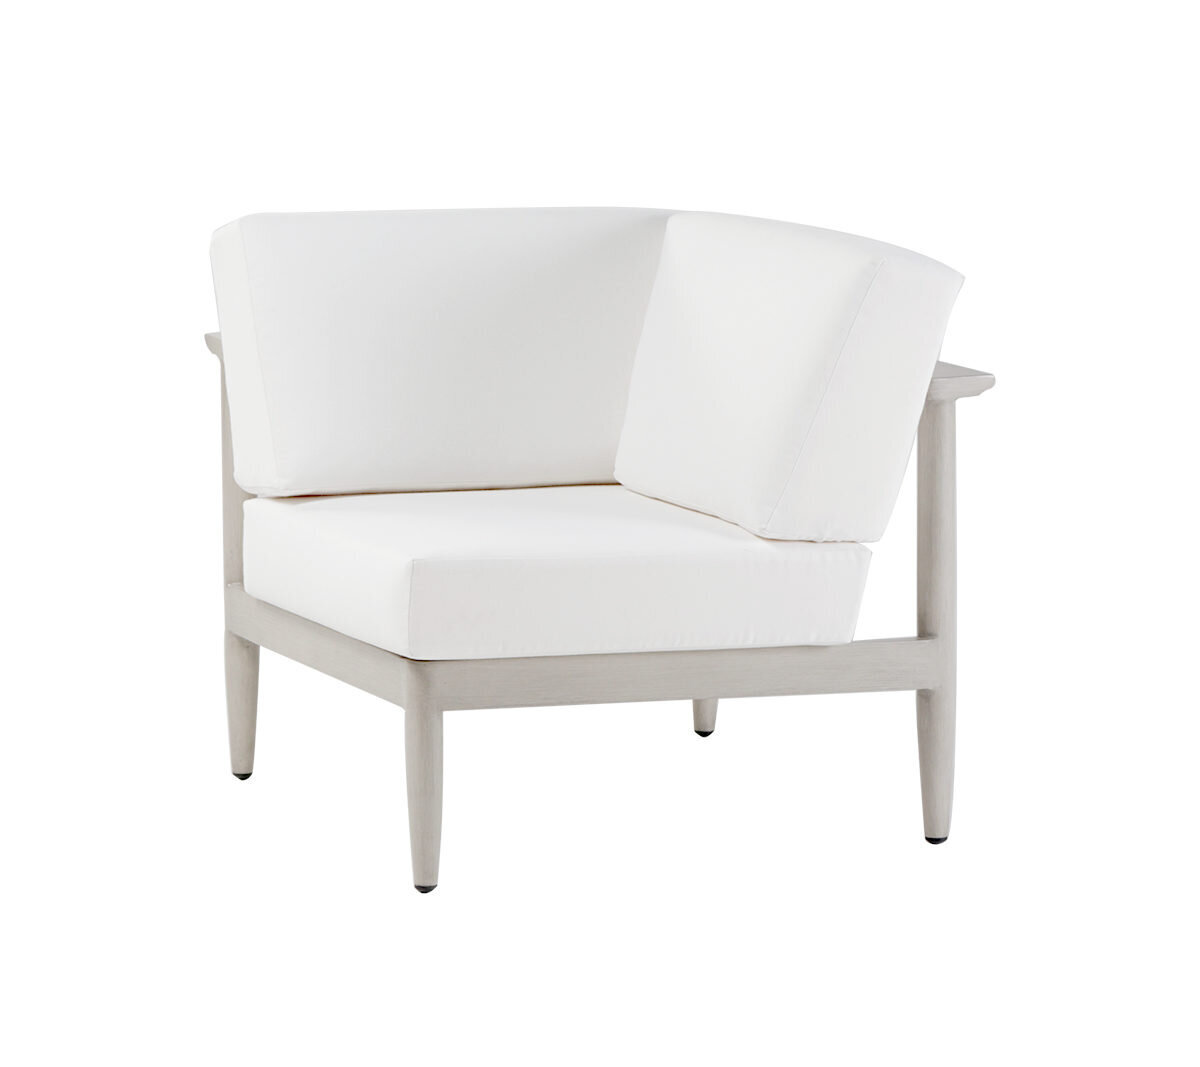
We found the perfect Ratana sectional in The Wicker Tree showroom out here in Langley. We loved the light white washed aluminum frame that had the look of white washed wood but that would stand up to any weather. We also loved it’s clean lines and how it felt like the perfect blend of modern and traditional elements. The fact that the frame of the sofa was open on the bottom would also keep the space looking lighter and more open rather than heavy and weighted down.

We took the dimensions and taped it out on our patio to ensure it would fit the way we wanted it too. Once we knew it would fit we started looking at colours. We could custom order whatever colour we wanted for our cushions. I looked at all the inspiration pictures I loved and noticed that everything I had saved had white fabric cushions. So we chose the colour Idol Snow in a Sumbrella fabric (the best outdoor fabric, which is especially necessary when going with a light colour).
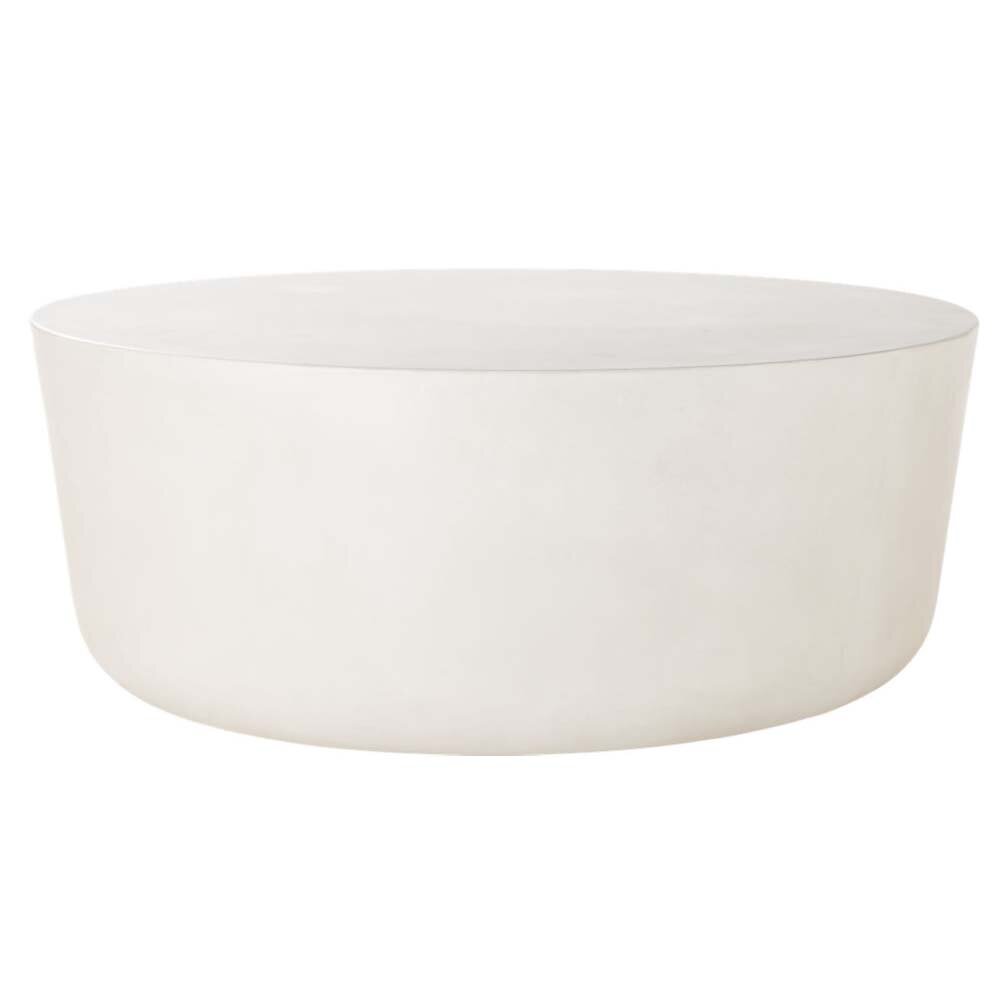
Once we had our outdoor sectional decided upon we started looking for coffee tables and cushions. I wanted a table that would elevate the space and I had seen one at CB2 a few months back that I loved. It was a cement round coffee table that could be used indoors or outdoors. I mocked it up in photoshop with our sectional and taped it out on our deck and it was the perfect size.

Step Three
Accessorizing and adding colour
Consider the palette of the exterior of your home and how to tie it in with the interior palette.
All of our colours for the large scale items were neutrals (which is what I like to do across the board) so I didn’t need to worry too much about making the colours from the interior of our home flow to the exterior just yet (with the exception of the frame of the sofa). Accessorizing is where it got a bit trickier for me.
The interior of our home is all based on a warm neutral colour palette of charcoal grey, white washed wood, creams, tans and golden accents where as the outside of our home is navy blue. I wanted the outdoor space to look beautiful with our exterior but not feel like a complete departure from the interior of our home especially since you can see it from our living room window. So the accessories would need to be cooler tones to work with our exterior colour palette but still work with the warmer tones inside.
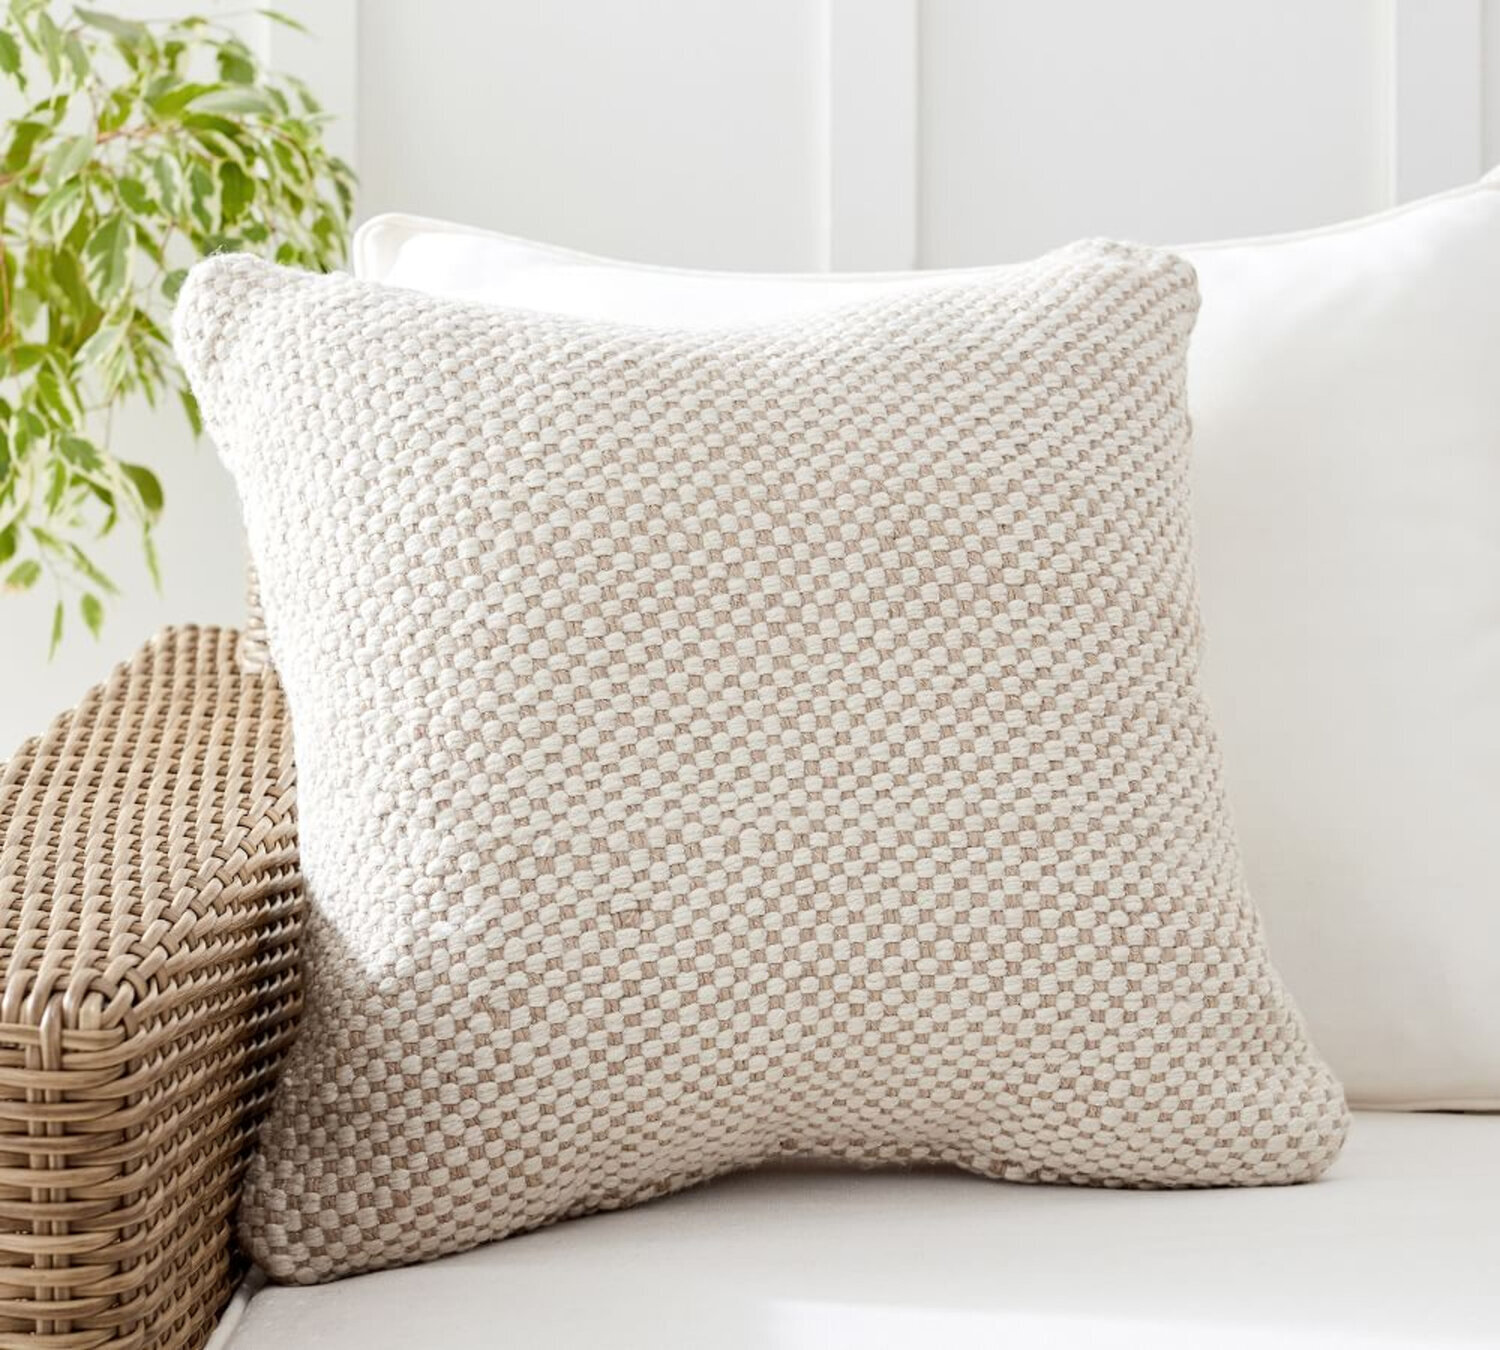
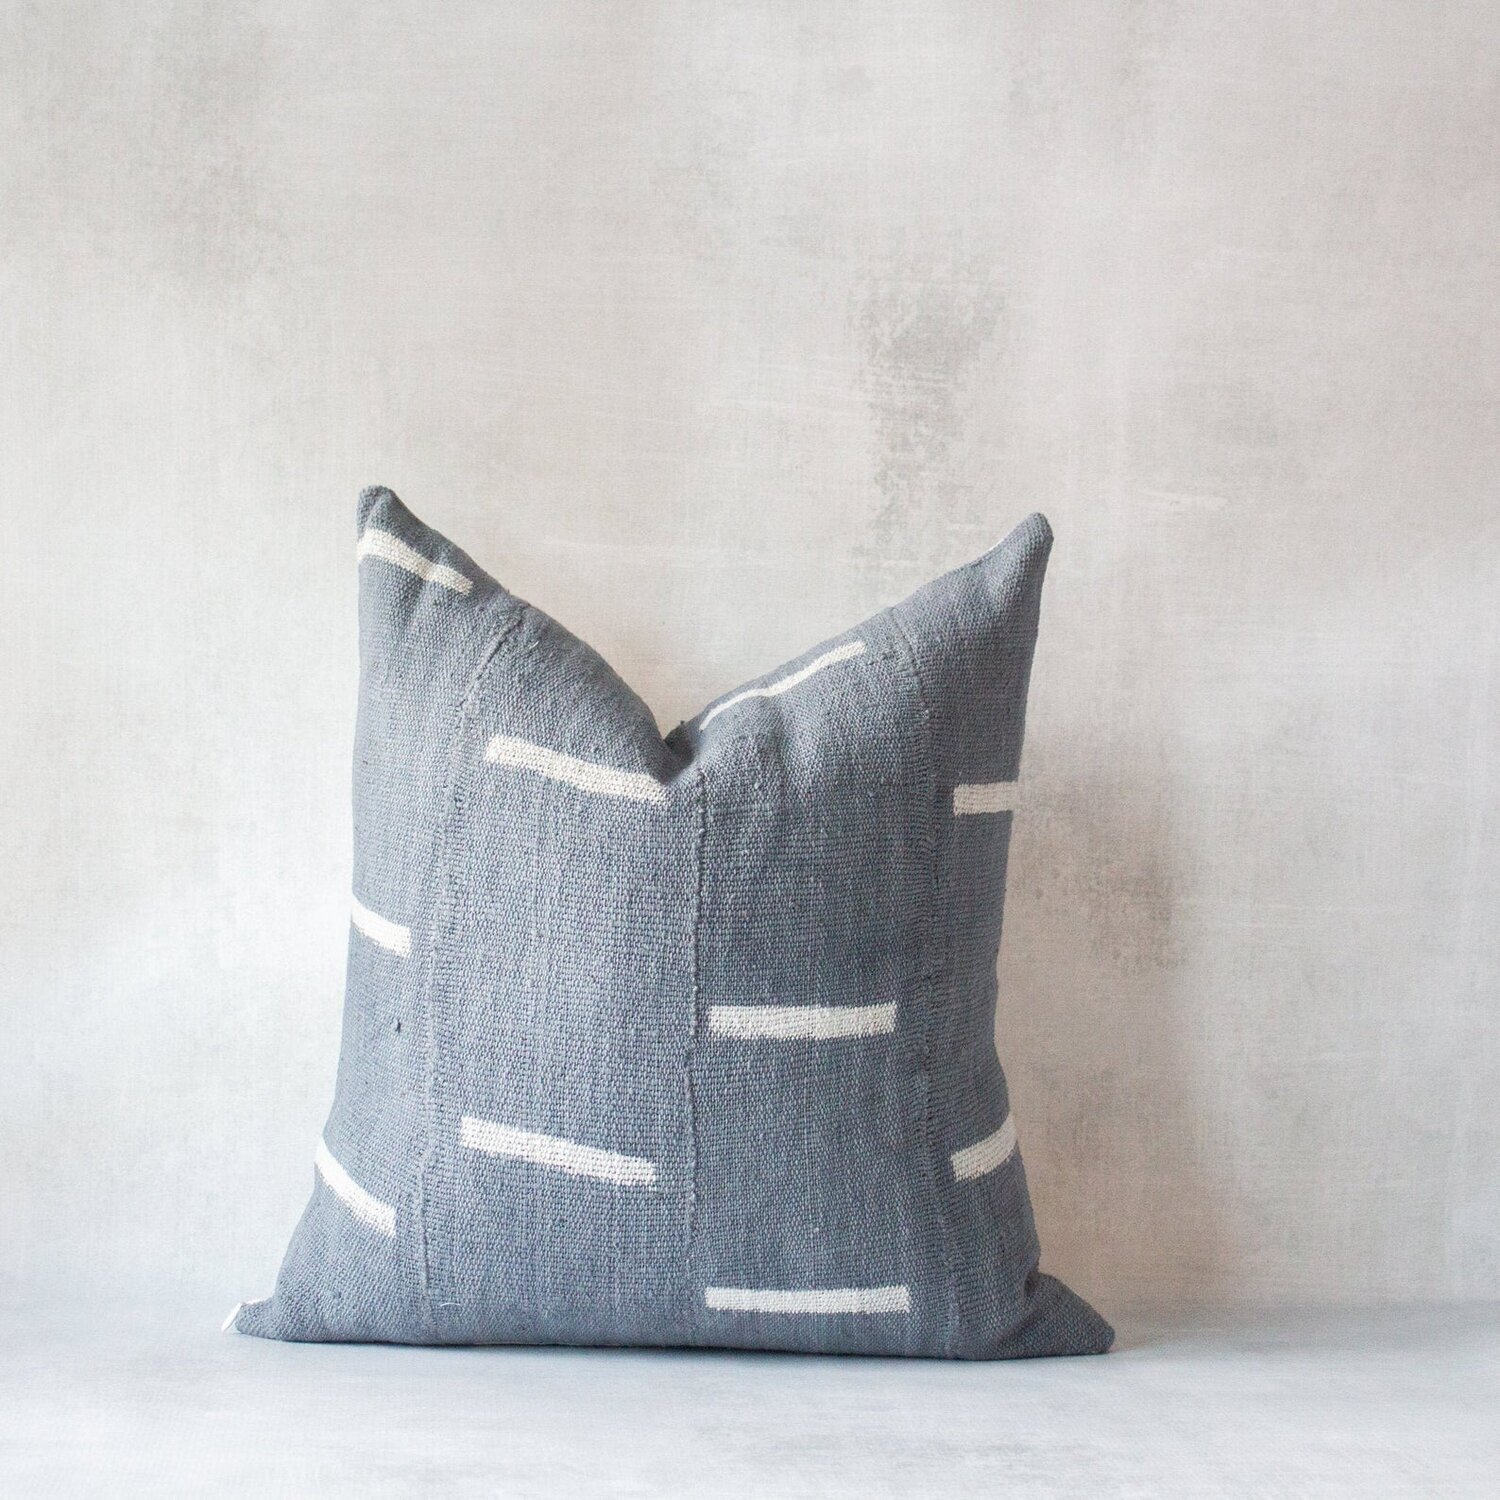
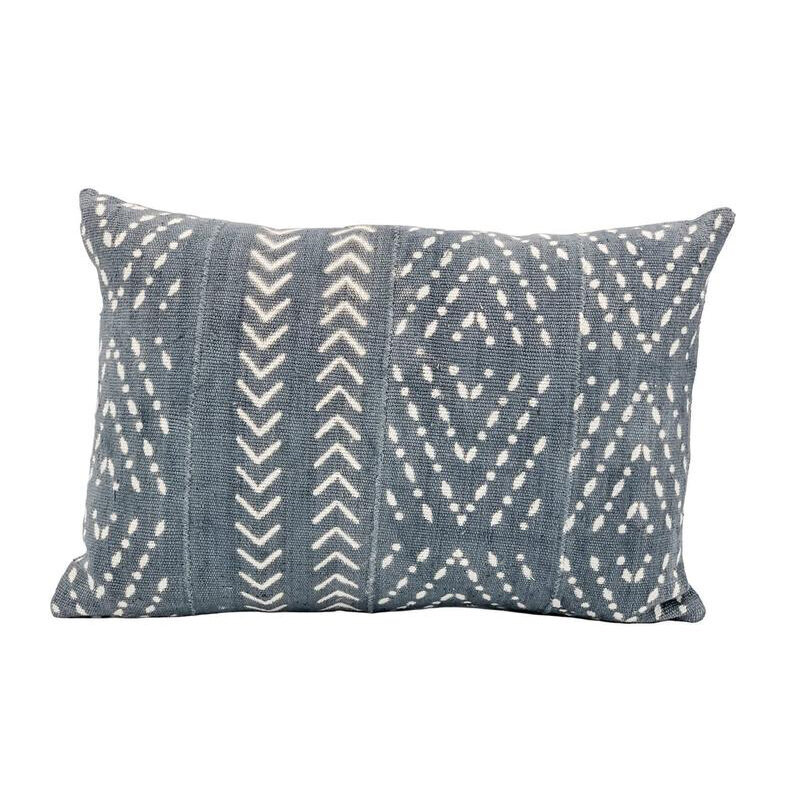
I looked through our inspiration images and decided that the cushions I originally wanted weren’t right for the space after all. It would be too much tone on tone and I feared the design would fall flat. I had originally wanted to order Mudcloth cushions just like the ones at the Malibu Surfrider (pictured below) which I have loved for ages. Instead I looked for similar patterns in a colour that would work with the exterior colour of our home and add more dimension. I ended up finding this beautiful greyish blue colour that would perfectly pull the colour from the walls onto our sofa. We went with a large pillow size (22x22) to create a cozier look and really soften the space. We also ordered some 20x20 tan pillows from pottery barn to layer in and tie in the interior colour palette. I am still waiting for them to arrive but I’ll report back If we decide to keep them or not.

image source: google images
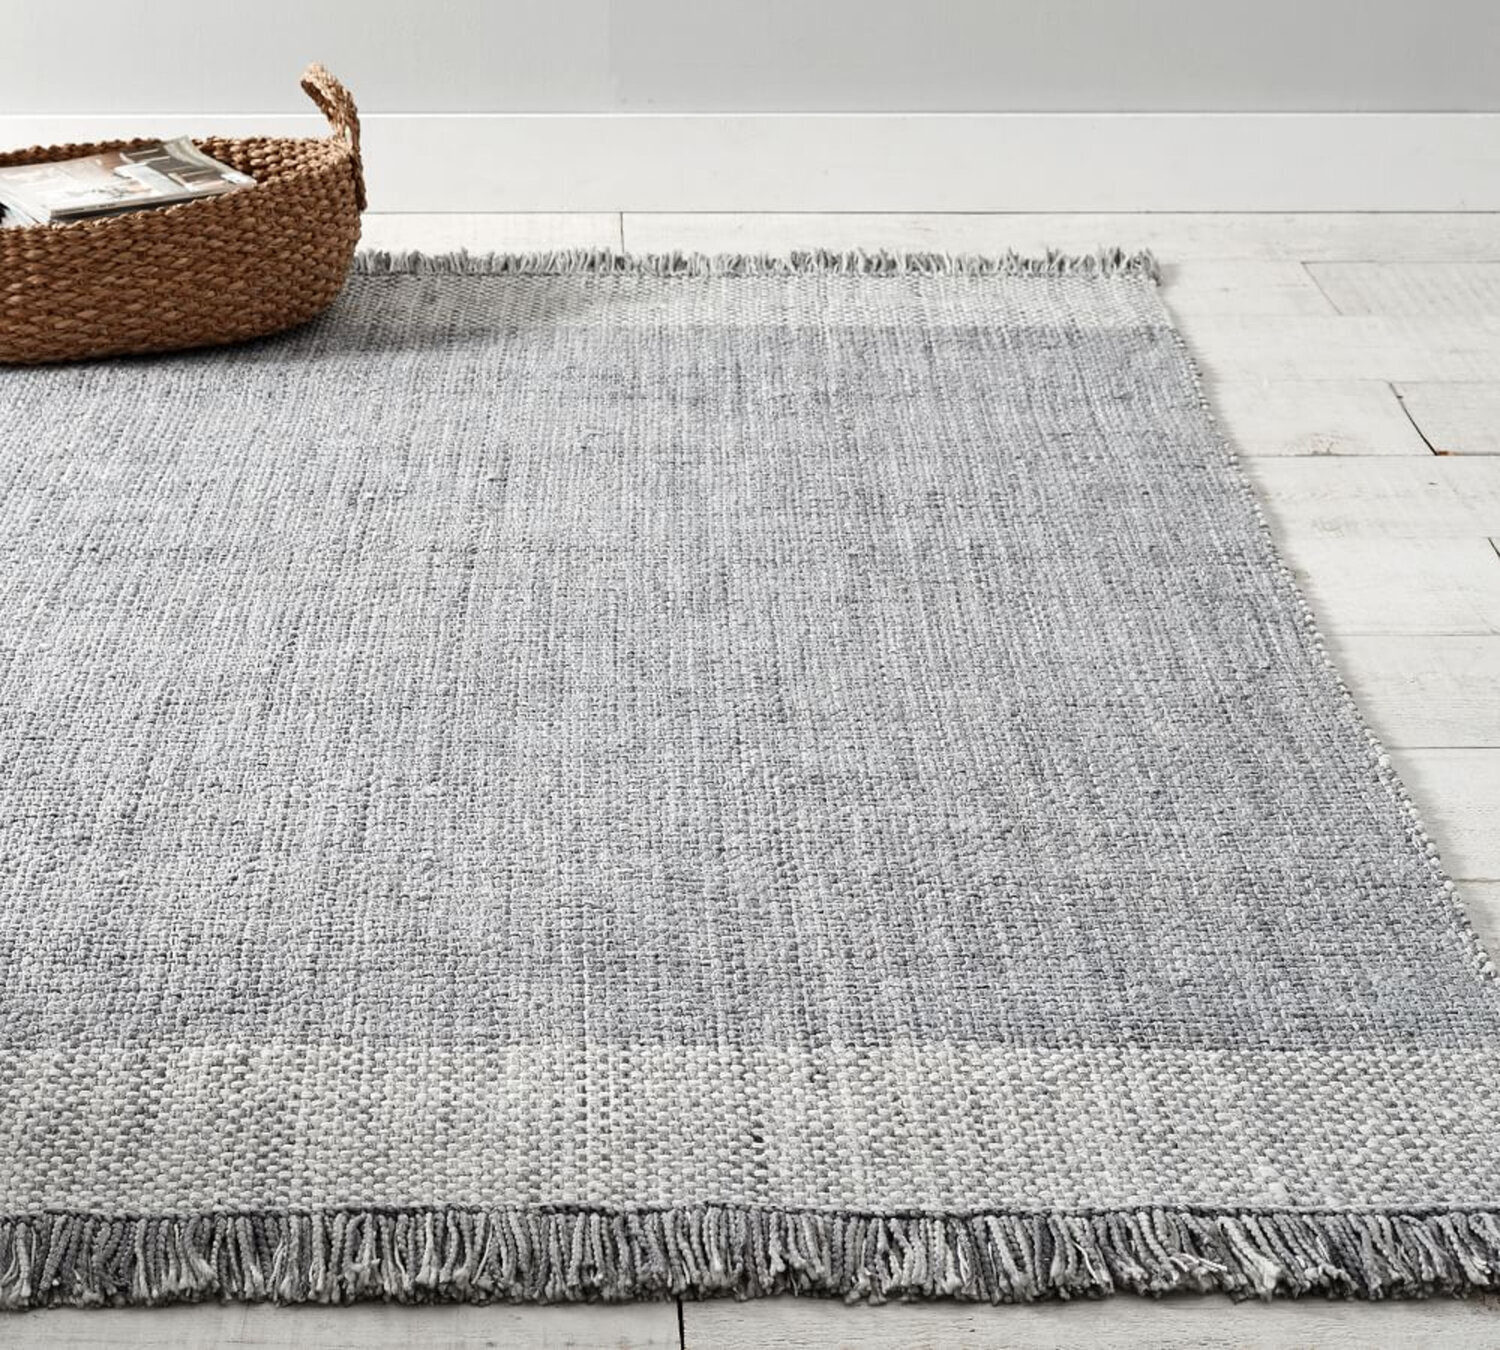
Then came the rug saga. I debated for a few months over which rug to go with. I had always loved this tan indoor/outdoor rug from pottery barn but when I mocked it up, it fell a little flat. It blended in with the flooring of our patio and would really look better if you had a darker tile floor. After much deliberation I decided to go with the greyish/blue rug that would pull the colour of the walls down to the floor and weight the space down and define the sitting area more than the tan rug would have. In the end I am so happy we made the decision we did even thought it felt like the risky decision.
Step Four
FINISHING TOUCHES
For our centrepiece I’ve purchased a few pots that I can have on rotation based on the season, the event or how I am feeling that day. If I want to weight the space down I have a blueish grey pot I can use that ties in with the colour of our exterior and our accent cushions and if I want a lighter look I use a white earn pot. If I really want it to be a bit more feminine I bring out a little pink pot I bought at Welk mart ages ago that I had been using to store old pencil’s and pens.
Outstanding items;
Throws/Blankets: we still need to purchase some throws and outdoor blankets. I am thinking we’ll either go with a solid complimentary colour throw with a texture or a Pom Pom detail or go with a patterned blanket that incorporates the colours of our palette into it.
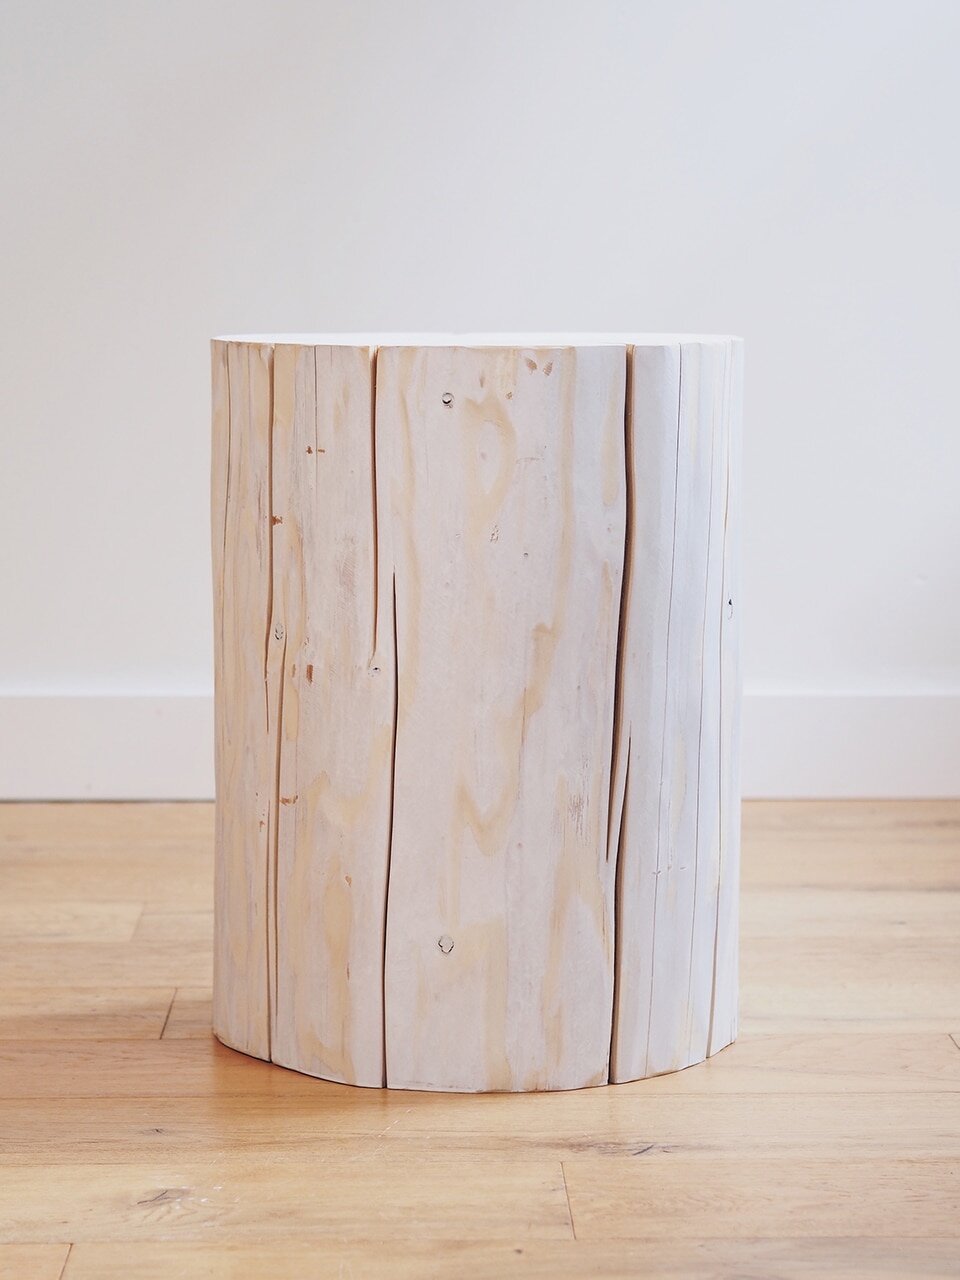
Side table: the little white side table we currently have is being replaced with a Salish wood stump side table that is on back order right now.
Flower Baskets: We will be adding some floral hanging baskets to our columns next summer and hopefully a pergola of white clematis to soften the space and make it feel more garden like. At the moment I really want all of our florals to be neutral colours so I’m looking into white floral trailing plants like bacopa.
To shop this post and more rooms in our home, check out the shop our home
SHOP

RECOMMENDED